Affinity Photo - The real photoshop alternative
My impressions about Affinity Photo from Serifs: the real Adobe Photoshop alternative
It's been a while since I started using the whole Adobe Photography plan; I really love to use Lightroom to create a searchable catalogue of all my shots, and then make the first adjustments on the raw files.
Moreover, the (obvious) perfect integration between Lightroom and Photoshop make the Photography suite a great choice for creatives. But in the end, it is quite expensive; last but not least, Photoshop is working great, but I need more and more external plugins.. so the total cost is getting even higher!
I tested Affinity Photo when it was in beta version, and I found it a great and visionary piece of software. Now, after more than 4 years, I went back to see how things are going.
Affinity Photo vs Photoshop
Usually, switching from a well-known software to a completely new one is a nightmare. For example, I have to admit that in the past I tested DxO Photolab and Capture One, but the initial effort was so high that I gave up immediately. My fault, of course... but I'm not an R&D department, so I have to make choices based on a costs/benefits approach.
Affinity Photo seems to be developed with a clear idea: not to frighten curious Photoshop users. This is a great simple concept, isn't it?
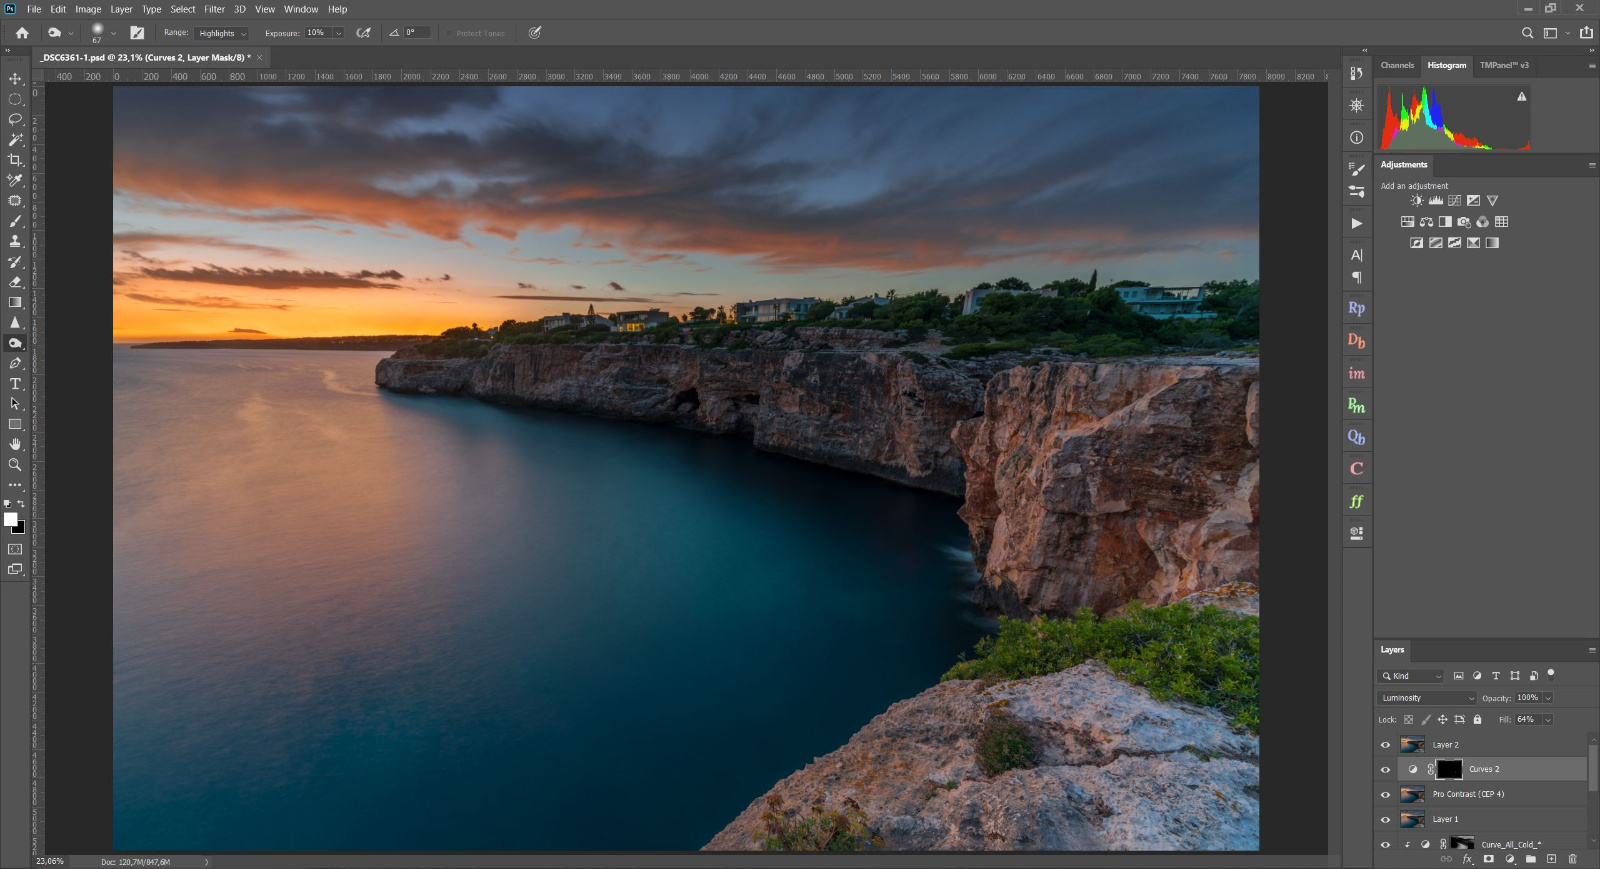
So, you will find more or less the same keyboard shortcuts (not exactly all of them, but let's say 95% of the most used ones), very similar names, panel disposition, filters, etc
Even the icons are similar, probably a bit nicer (even if Photoshop icons seems to be more "professional").
There are some little tweaks you will have to do, in order to re-gain the interface you are used to, but really minor issues (for example, move some panels).

Affinity for landscape photographers
Raw development
Do not worry, you won't miss the friendly sliders of Camera Raw, that we are used to!
As soon as you open a raw file, Affinity Photo shows a window with the typical settings we have to apply to a file before switching to the "real" post production.
The only thing I was not able to test is the availability of lens profiles. Affinity was able to identify my Sony SEL lenses (and to apply a correct profile), but not my Laowa. This is quite obvious because Laowa does not have a chip. so it cannot pass exif information. But Affinity does not have a drop down field to manually select a profile.
I did another test with my Parrot Anafi DNG, and even in this case Affinity was not able to set a profile (Lightroom is able to get it).
Luminosity masks
Probably the most important thing for landscape photographers is the ability to use luminosity masks to selectively control the adjustments; at the beginning I was quite worried to loose them, working in Affinity Photo. But a very short research showed me that in AP there is an even more powerful tool for doing the same, and it is called "Blend ranges": the point is that you can choose how an adjustment layer blends in the image, based upon the luminosity.
In fact, for every adjustment layer you can choose "Blend Option": a new panel appears, and in the right graph (as per figure) you can choose where the adjustment will be applied and where not, based on the pixel luminance.
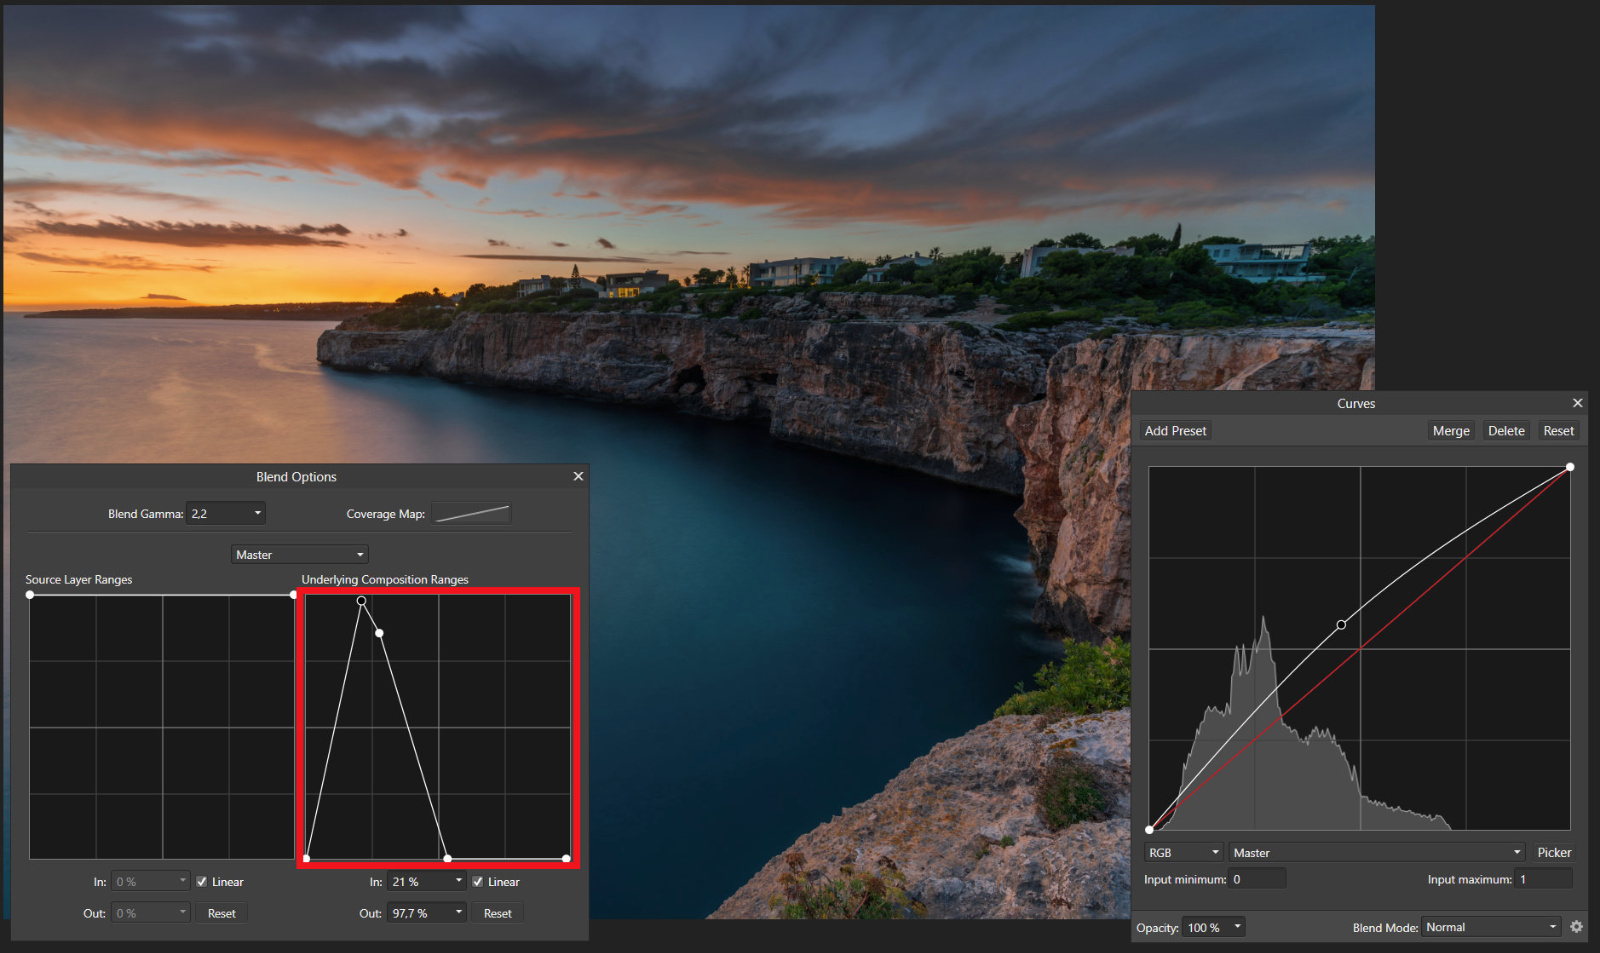
In some cases, it is even more useful and powerful than the luminosity masks!
Noise reduction via smart object
As a nightscape lover, many times I shot more pictures to stack them, in order to strongly reduce the noise of the image. Even if there are many third party softwares that can do the stacking, I prefer to use the native function inside Photoshop: create a smart object, and then set the stacking mode as "mean" or "median".
I find this technique extremely powerful, and reminds me when I was a biophysical student working on non destructive testing with digital imaging....
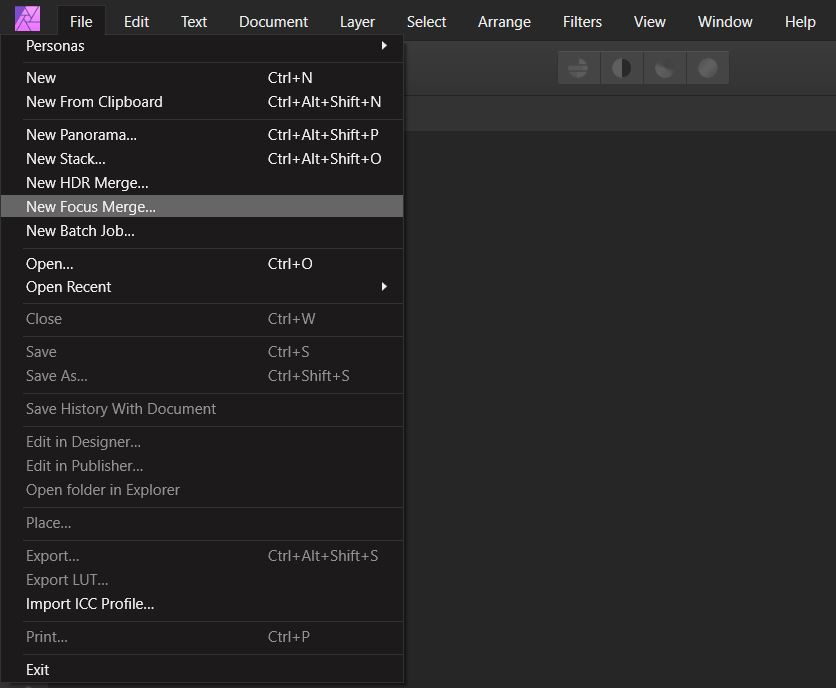
It is possible to use the same approach in Affinity Photo: select "File" -> "New Stack".
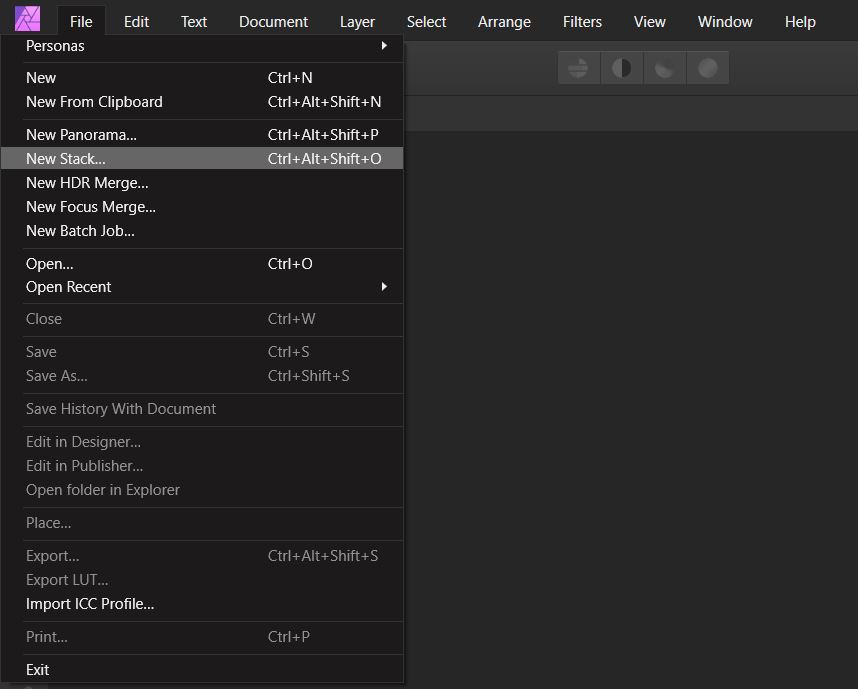
The process is really straightforward, and the software automatically creates a new file, with all the aligned shots stacked in a single layer. It is possible to select the stacking method clicking on the operator on the left of the layer name.
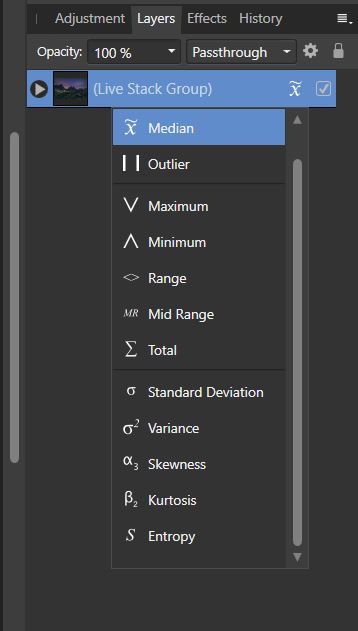
"Mean" and "Median" are my most used ones, and they are both present.
Nik collection
I'm not a great fan of plugins, mainly because the easy "slider approach" tends to create images that look all very similar. Do you remember the (in)famous Photomatix effect? I do, really well.. :D
But despite this, the good ol' Nik Collection remains a great tool that I still use sometimes in my workflow.
And I'm super happy to see that it works even in Affinity Photo.
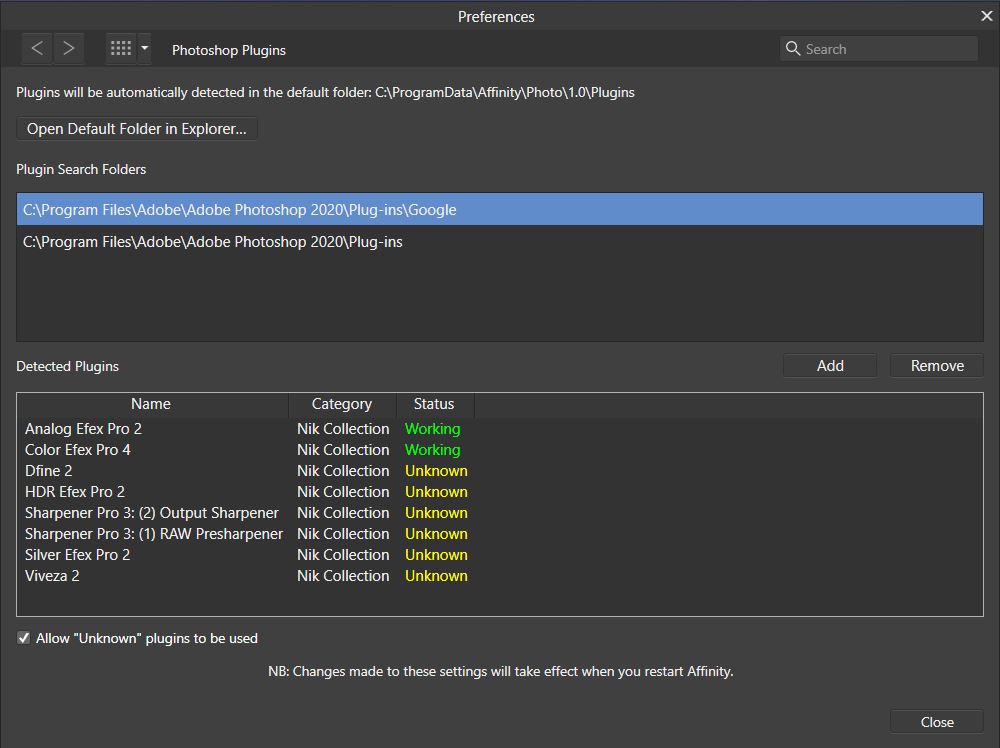
Just to clarify: I am still using the old Google version, that I regularly paid in 2013 (!). I decided not to re buy it from DxO, and I am still using the old one. It works nearly flawlessly in Adobe suite, and it works at the same level in Affinity Photo.
I have to specify "nearly flawlessly" because I have color rendering problems in Viveza (both in Lightroom and in Photoshop), and I experienced the same problems in Affinity Photo. But apart from it, Dfine and Color Efex (my most used plugins) works perfectly in both the software.
To let Affinity Photo see the plugins, you have 2 options: you can reinstall the plugins, adding Affinity as a new software, or you can go into the Affinity Photo preference dialog, and tell the software to look for plugins into the Photoshop folder.
Just a note: when used in Photoshop, you end up with a new layer named as plugin used (i.e. "Color Efex Pro"). But in Affinity Photo the plugins modify directly the selected layer. For this reason, I suggest you to make a copy of the visible layer, and then use the Nik plugin.
Focus stacking
I'm not the kind of photographer that uses this technique very frequently. But exactly for this reason, I do not want to spend money for an additional tool that does focus stacking. Affinity Photo can do it natively, and for my personal taste does it in a very nice way. It is called "Focus Merge".
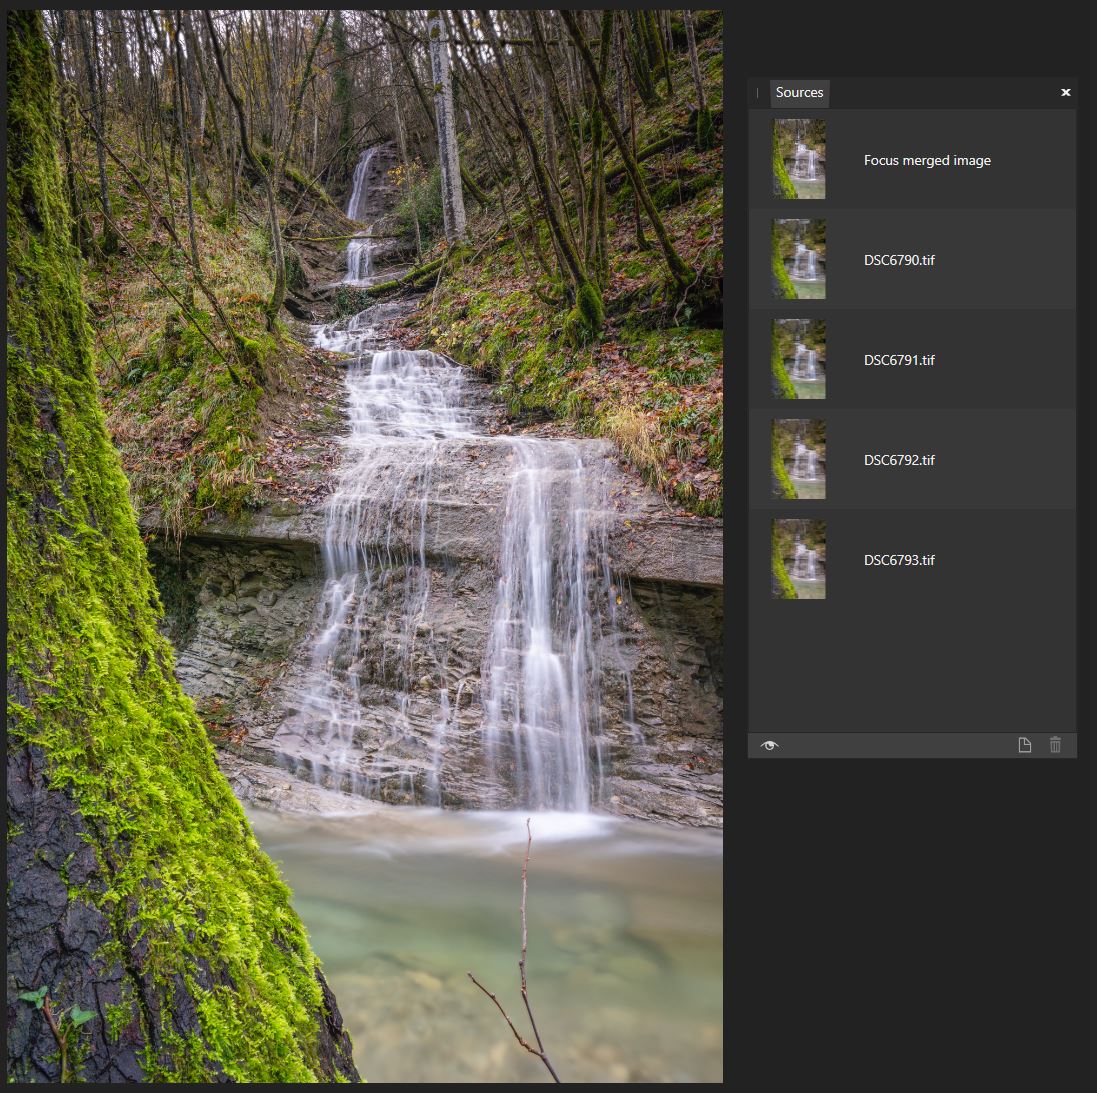
Exactly as it happens for the stacking process, you simply have to load all the source images, and then the merge process will begin.
A new window (named "Source") will open, and there you'll be able to fine tune any artifacts.
The only attention point is that, as soon as you close the Source window, you won't be able to access the sources anymore.
What I am missing
Honestly I think that Affinity Photo is a real alternative (probably the best one) to Adobe Photoshop.
In my personal opinion, Affinity Photo can replace Photoshop for 99% of the users. The only thing that I found missing is the ability to use some special panels I use sometimes in Photoshop, like Raya Pro from Jimmy McIntyre and Tonality Masks from Gaspare Silverii.
Unfortunately it is not so easy, at least for me, to get rid of the whole Adobe Photography suite; the main reason is the lack of a real alternative to Lightroom, when it comes to library management. Organizing and searching through all my shots is very important, and I still have to find a way to do it outside Adobe Lightroom.


