How to do image blending the correct way
HDR and image blending are not the evil. But we have to pay attention to some little details, in order to avoid the terrible fake effect we can see on many shots
The new camera sensors are fantastic, really! I have to be very honest: since I passed to Sony, rarely I've been forced to bracket my shots in order to deal with the light dynamic range.
Nevertheless, it is important to understand that there are (and always will be) scenes in which the luminosity difference is so high that a sensor simply cannot cope with it. Sometimes filters can help us a lot, but there are situations in with we are forced to blend multiple bracketed images togheter.
If you want to read a detailed article about image blending, you can read my old post here. Instead, the following lines will cover a specific aspect, let's say a more advanced approach.
The long story short
Yet another tutorial on HDR and image blending?? No, don't worry. Nowadays there are tons of perfect videos on how to blend multiple shots, in order to recovery bright or dark areas. It is not a problem to find a way to overcome the technical problems.
What I want to focus on, here, is a typical problem related to post production: the lack of contrast introduced by the blending process.
Why? Because lately on social networks I can see a massive wave of washed out images, with little or no contrast at all on shadows. There are some "colleagues" that claims to be the inventor of incredible and innovative blending techniques... but in the end we always speak about luminosity blending. The point is to do it in the right way.
I will show you the good and the bad way of doing it. My own workflow is based on the great lessons of Jimmy McIntyre; I'm not here to reinvent the weel.. If you want to follow the lesson of the master, go and check Jimmy's webpage!
I just want to show you a tip. Here I assume you are familiar with come concepts like layers, masking, luminosity masks, and create a selection from a mask
Blending the wrong way
When we speak about image blending to increase dynamic range, in the end we are speaking about luminosity masks. It doesn't matter if you create them by hand, or if you have actions, or if you got a super marvellous Photoshop panel. Here I used the Raya Pro panel, but the concepts is absolutely the same.
Let's start from a single shot I took during my testing of the incredible Laowa 10-18mm C-Dreamer.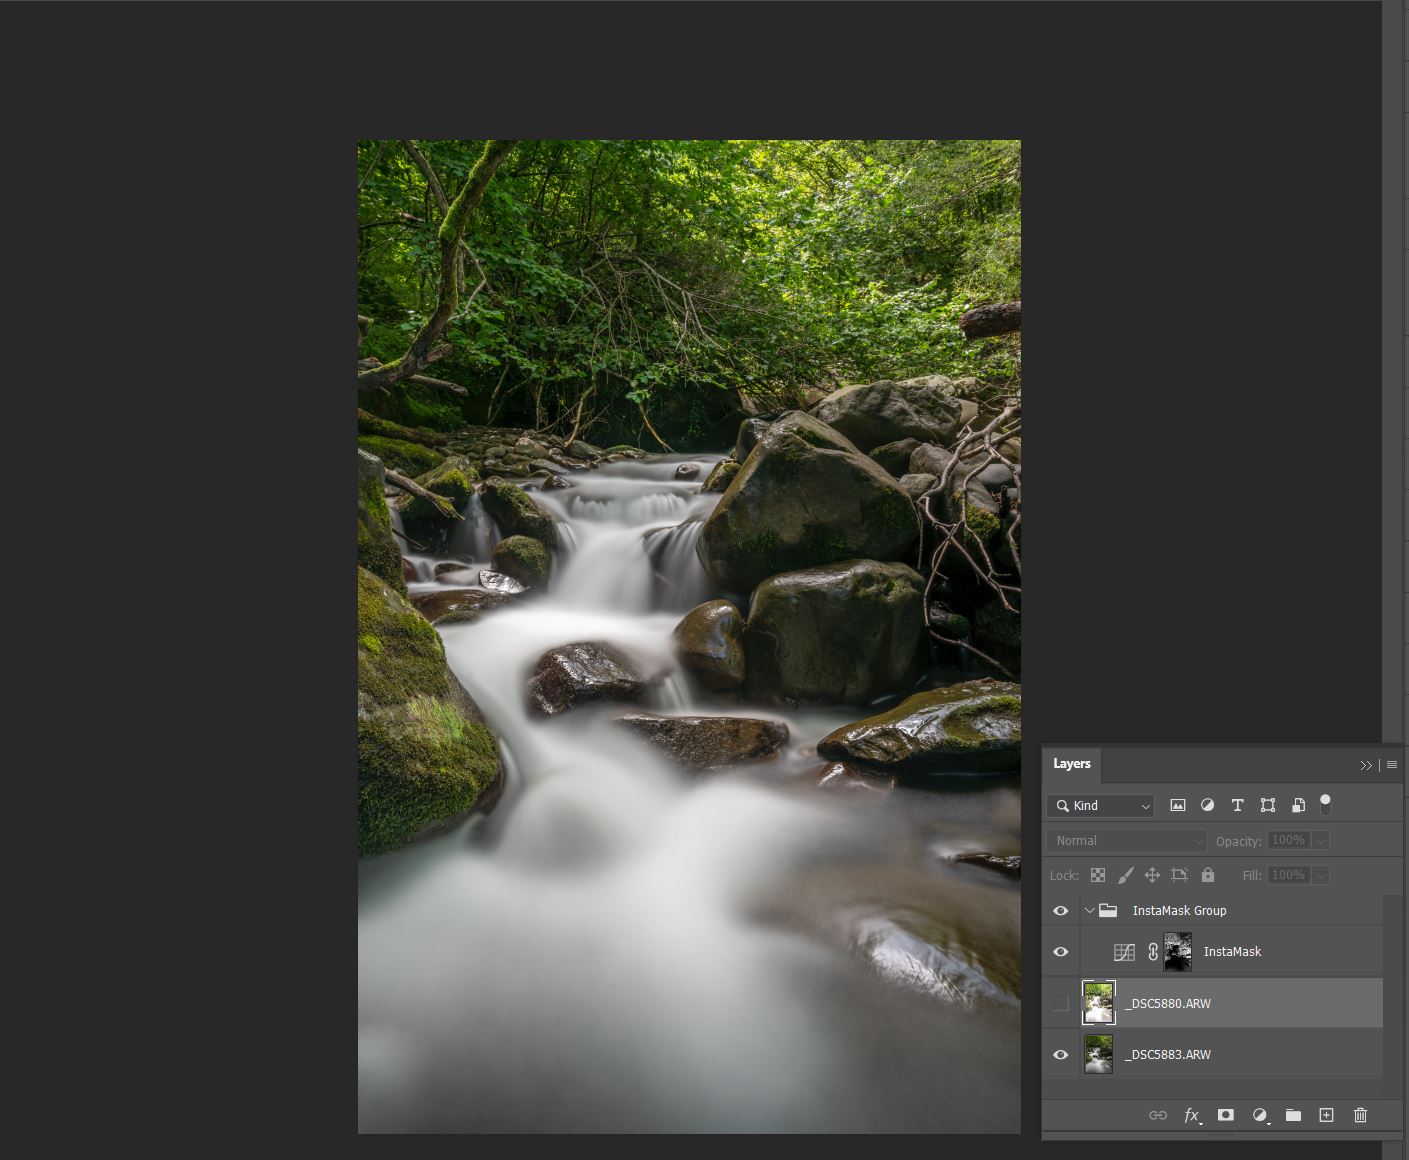
As you can see, the shot is overall good, but the shadows are too dark for my personal taste. Moreover, they are a bit too noisy, because I had to open them up a lot in Camera Raw. So I have to recover them using a second, overexposed shot.
I proceed as always: I load the overexposed shot as a new layer (remember to verify that they are correctly aligned!), then I create a black mask over it. I want to paint in only the shadows, using a dark luminosity mask. Here I selected the "dark 4" luminosity mask: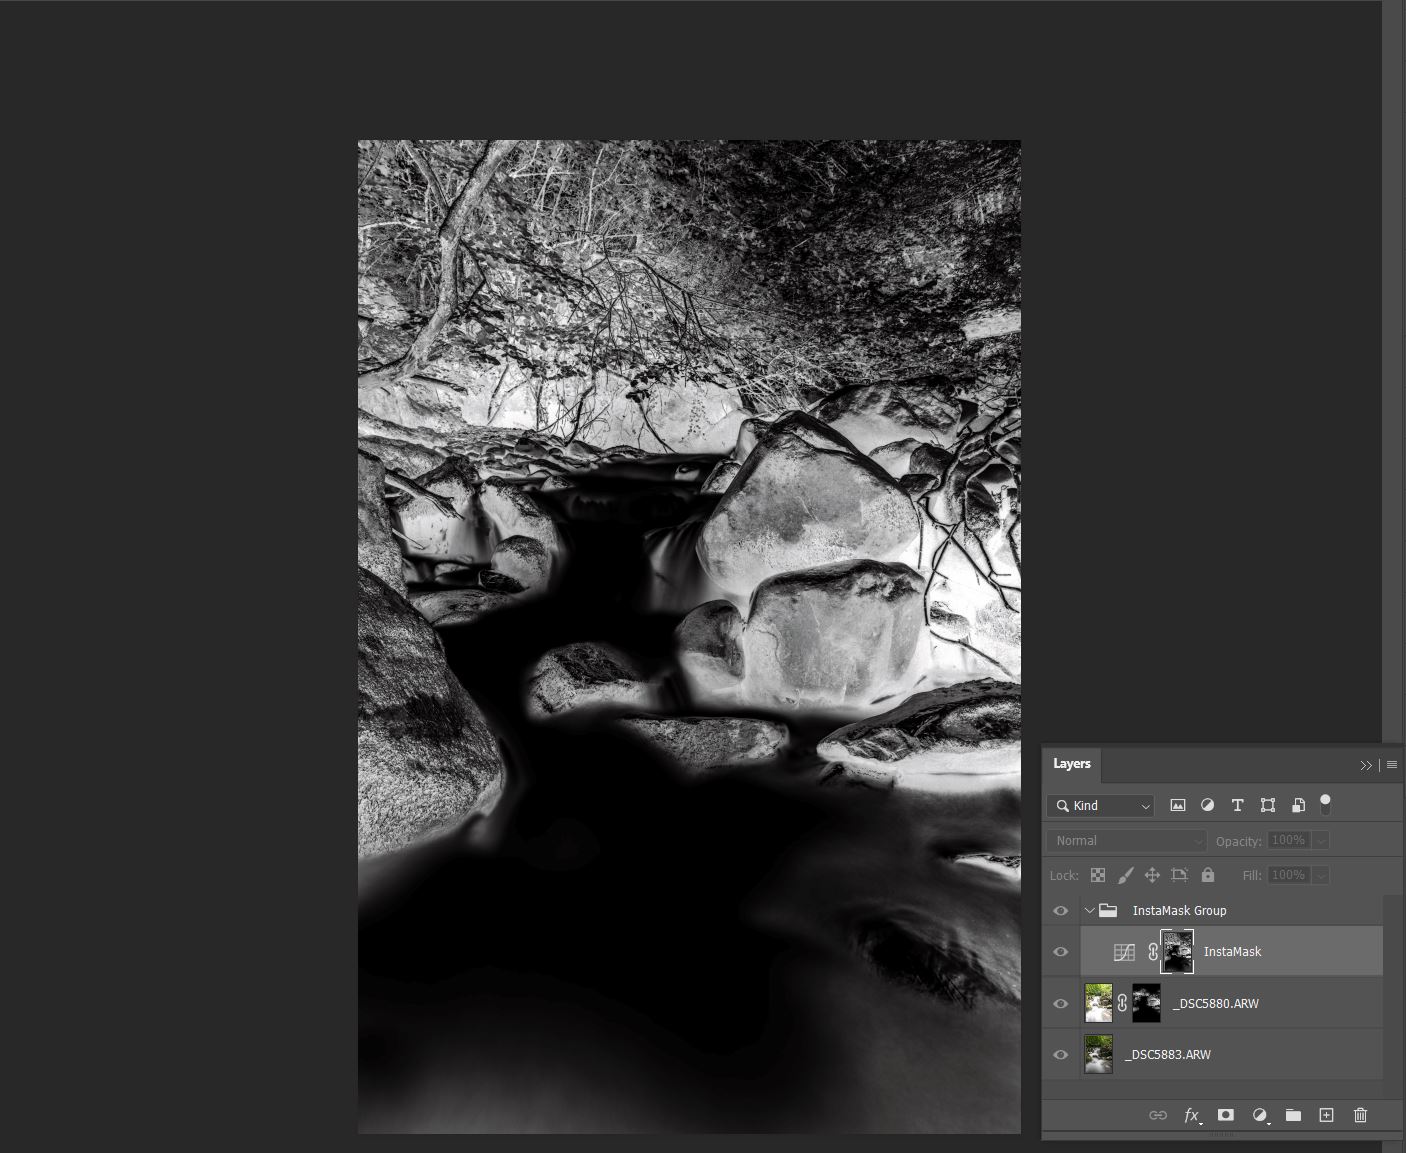
I make a selection from the above mask, and then I gently paint with the brush over the second layer dark mask. Very simple.
This is the final result.
As you can see, the result is already very good, but the image now has a little "innatural feeling". Not only we are missing contrast... but the problem is that our brain unconsciously notices that we are missing "real blacks".
It is not normal that such a shot lacks of a pure black, in zones that should be very dark.
A good postproduction is the one that creates a natural look...
How to re-create the natural feeling
What we have to do now is to get back the real darks. It is very easy (at least when you know how to do it): we have to create a "dark 5" luminosity mask, that addresses the real blacks.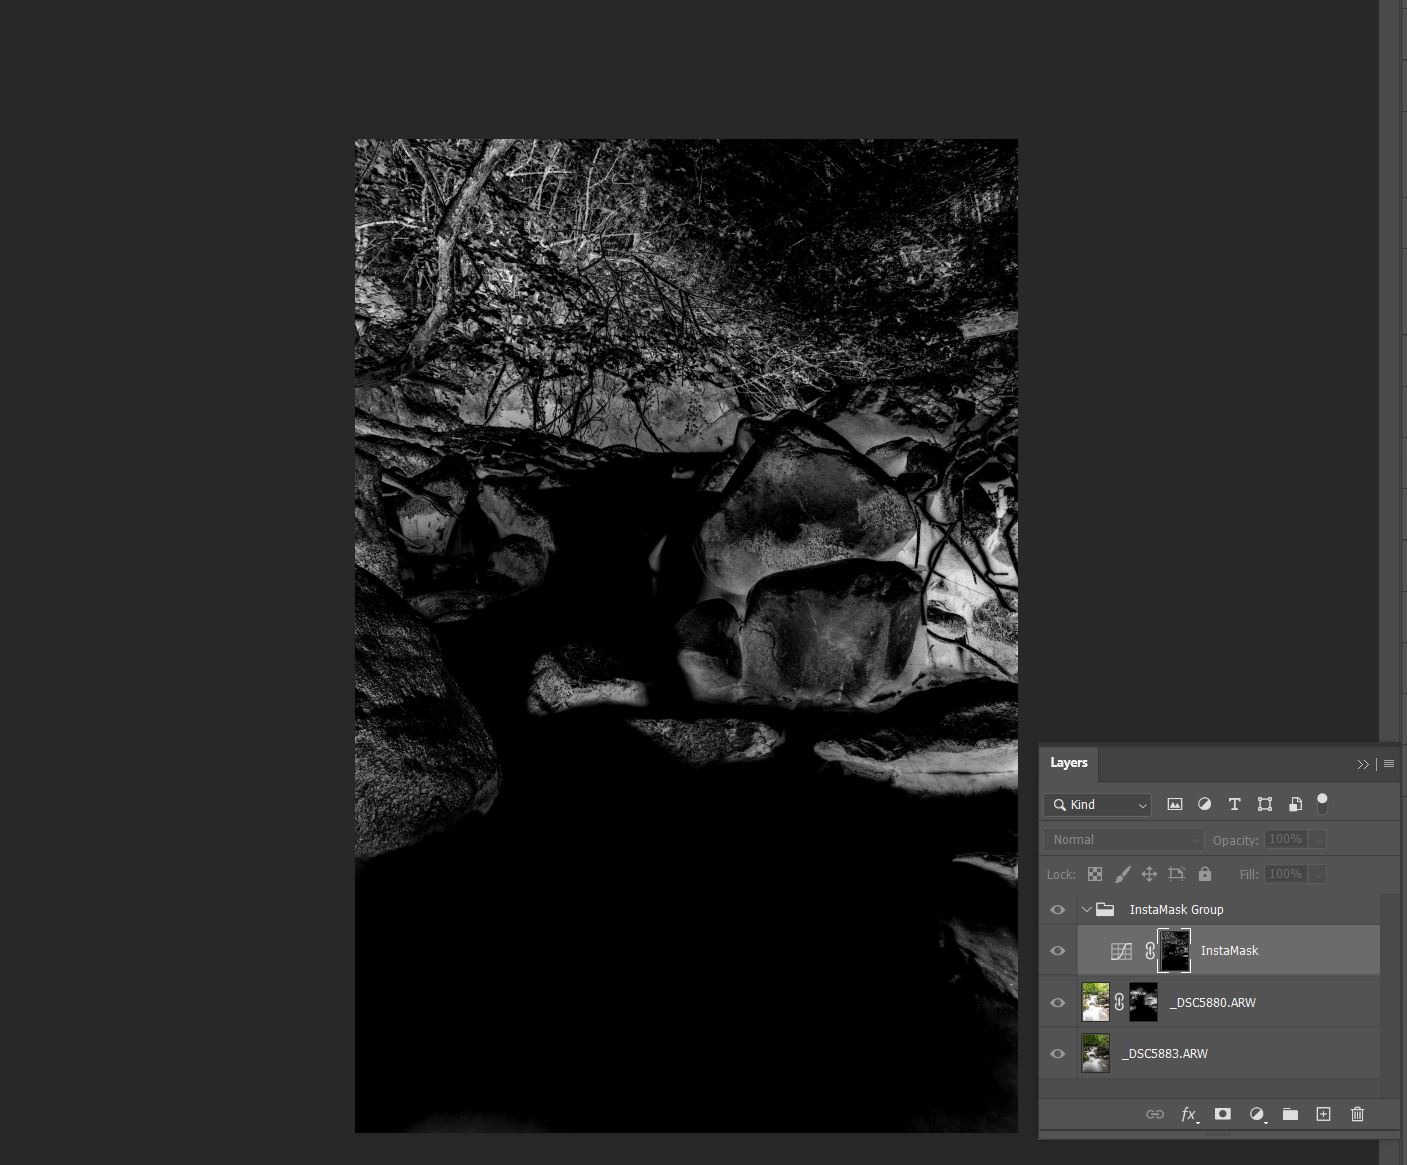
With this mask selected, we have to paint on the second layer mask with a black brush, where I want to get the blacks back. I suggest you to use a low brush opacity.
The result is this one: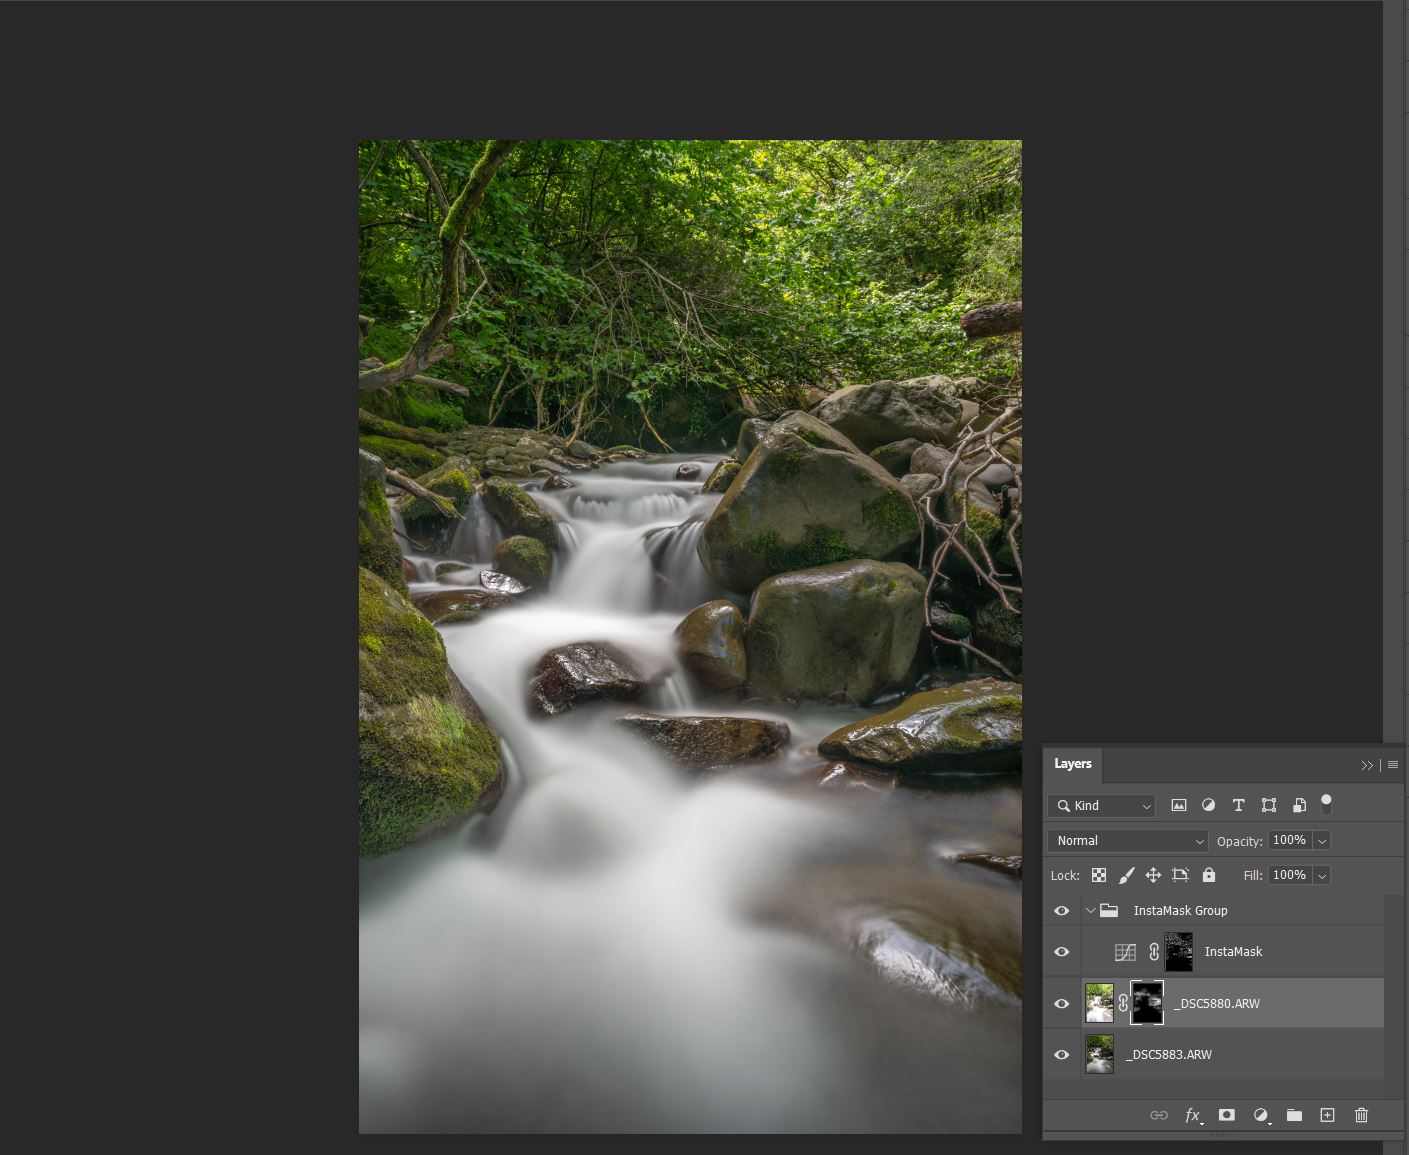
The image blended
You can see the difference here:

Conclusion
Let me say that I am not a great fan of image blending... but there are many situations in which a filter cannot solve the problems related to dynamic range of the scene.
We do not have to be frightened by image blending.. but we have to do it the right way.
Pay attention that, any time you blend in an over-exposed shot, probaly you are lowering the contrast of the scene. You have many option to avoid an unnatural look, one of them is to paint back the "real blacks" of the original shot.