Filters: quick tips for landscape photographers
Square or screw-on filters are great friends of every landscape photographers. Here there are few uncommon tips to use them in the best possible way
If you are into landscape photography, I'm quite sure you already heard about photo filters. There are many known brands, with different pro and cons; Haida, NiSi, LEE, Formatt Hitech, B+W, Cokin, Hoya, Singh-Ray, Tiffen.... the list is very long! I don't want to enter another flame war about which one is the best! I don't mind, and moreover it really depends on what you are trying to achieve. Moreover, as an official Haida ambassador, probably I would be a bit biased.... :)
What I want to tell you here is something that, sooner or later, you will have to deal with - whichever brand you will choose.
There are many guides out there about the use of filters (for example, consider the great article from my friend Francesco Gola), and I really do not want to repeat what others already wrote.
Here I would like to share some "unusual" tricks, that can be very helpful both on the field and in the shop.
So, lean back and just enjoy the reading.
Do not mix different brands
If you use screw-on or slot-in filters... do yourself a favor: do not stack different brands!
No matter what brand you will use, every filter that you put in front of your lens will introduce some colour cast. Of course, best brands introduce very very little colors, but no one is absolutely perfect.
Using products from different manufacturers will bring unpredictable cast into your images. Moreover, if you are using an GND, the effect will be even more problematic, because the difference will be present only on a portion of the image.
Fixing this kind of effect will be very time-consuming... So save yourself a big headache and do not do it.
If you do not have the right filter, it is better to bracket and take few more shots, instead of doing a mess.
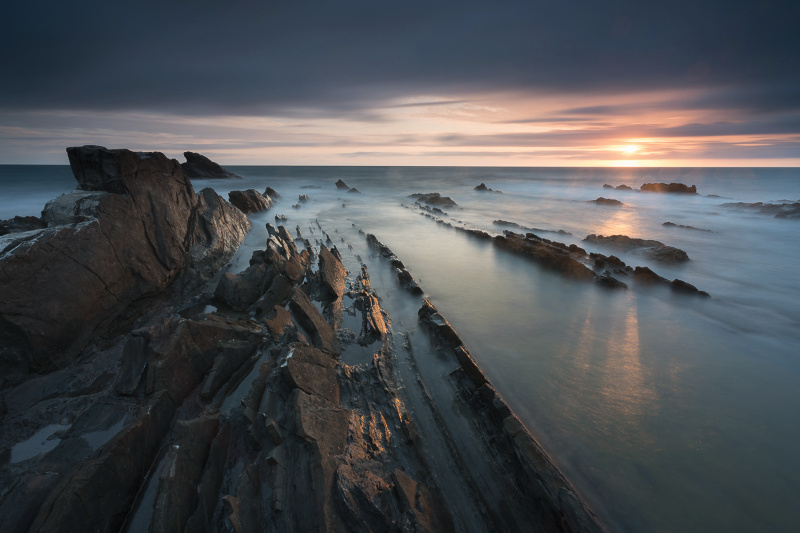
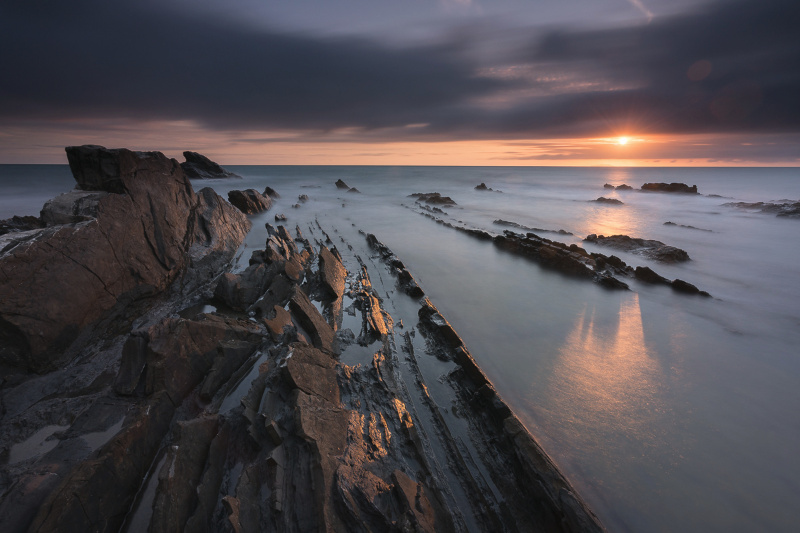
Below, a single shot taken in Livorno. on the left, the shot taken with Haida only filters (ND1000 + GND0.9 hard). On the right, the same shot with Haida ND1000 and Formatt-Hitech GND0.9 hard. The terrible color cast is absolutely evident. Moreover, the overall feeling is that colors do not match. Fixing later in post production can be very very tricky.
Save a lot of money, or do not save at all
This is a kind of suggestion that is always true, not only speaking about filters: if you want to make some tests to explore the many opportunities given by the use of filters (so you do not want to spend so much), buy very entry level kits. Shooting with filters takes a bit of effort, practice, etc. Moreover, quality filters can be very expensive.
So it doesn't make sense to buy "average" ones just to test; there are very cheap ones (made of resin), that are perfect to understand how to handle them, if they fit your photography style, etc.
As soon as you will decide that filters are perfect for your pictures, then you can invest money in quality ones! And trust me... you will do it for sure: you really can't imagine the difference a good filter can make, in terms of overall quality, contrast, vignetting, color casting...
Last but not least, with cheap filters you can understand what density best fits your needs... so you can buy quality glasses knowing in advance that they are exactly what you expect (do not underestimate this point!).
Go bigger
This tip applies mainly to screw-on filters (even if sometimes it could be applied also to slot-in ones).
When you want to buy a filter, you have to decide the diameter. Choose the one of the biggest lens you have (biggest in terms of filter thread). Do not focus on your favorite landscape lens only...
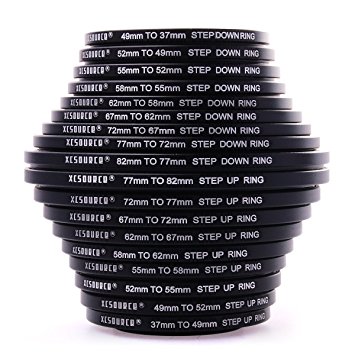
In fact, there are some adapters (called "step-up") with 2 threads, that you can use to mount for example a 77mm filter on a 67mm lens. This is extremely handy, because this way you buy a single filter that fits all your lenses (probably also the ones you will buy in the future).
Use Xume adapters
Another useful tip for screw-on filters users: if you are seriously into long exposure photography, you will use very dark ND filters for sure. Yeah, the final effect of an ND1000 is incredible... we all love the silky or milky effect on the water... the stripes of the clouds... the way they permit you to take a shot of a crowded place, removing all the visitors...
But with great power comes great problems: usually it is nearly impossible to focus (even manually) with a dark neutral density filter already mounted.
Every single tutorial about long exposure will tell you to take off the filter, compose your frame, focus on your subject, read the exposure metering. After that, disable autofocus, put back the filter, and then take the shot. Right?
Perfect... but keep in mind to pay a lot of attention not to change the focus settings screwing the filter back on.
Nothing more frustrating than discovering you moved your focus ring, after 5 minutes exposure. Grrrrrr...
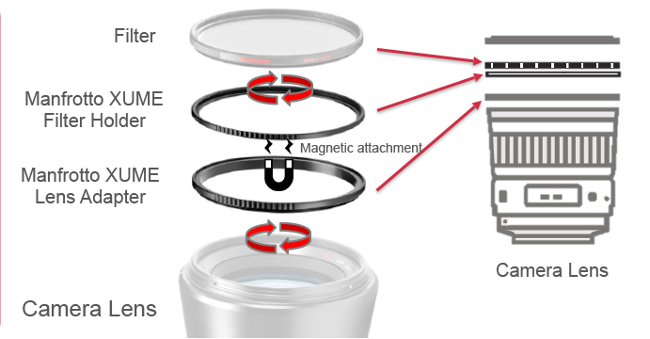
What you can do is to use Xume adapters (now a Manfrotto product): they are a magnetic adapter made of 2 pieces... one on the filter, and the other on the lens. You can detach and attach back the filter without the risk of turning the lens. Perfetto!
A scarf is always a great friend
Believe it or not.. even if your camera was labeled as "tropicalized", it is not perfectly sealed! Probably the water is not able to find its way to the internal part of the body, but if we speak about light leakage... well, it is a completely different story.
When we speak about long exposures, it is extremely important to be sure that no light leakage will occur; there are several possible sources: in a DSLR, the viewfinder is the first (mirrorless cameras do not have this problem, of course). But do not forget the lens: the mounting area, the rings.... And so on.
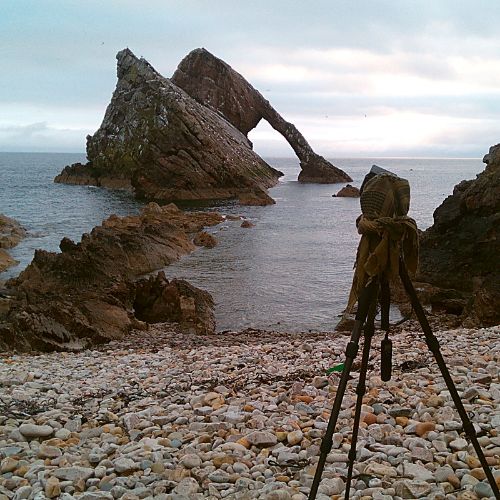
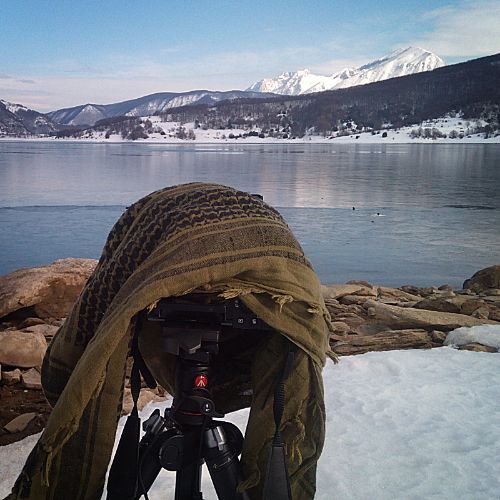
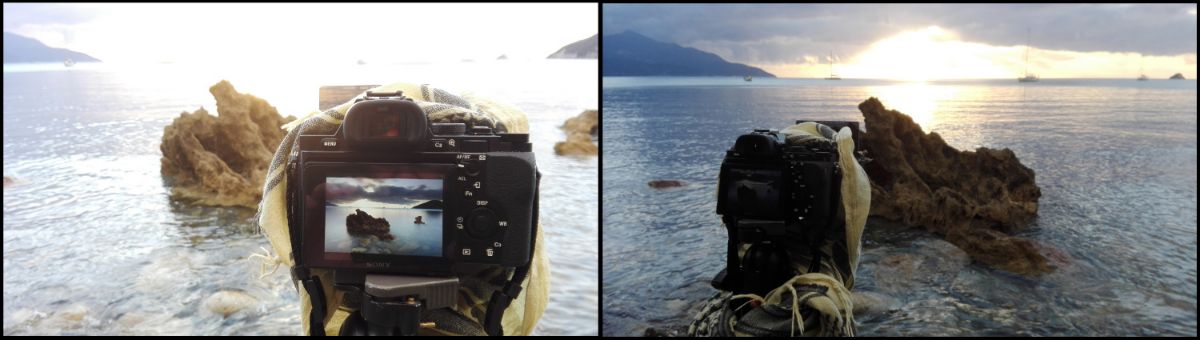
In case of light leakage, your shot will be destroyed by reflections, strange lights, and a total absence of contrast. Just to show you an example:
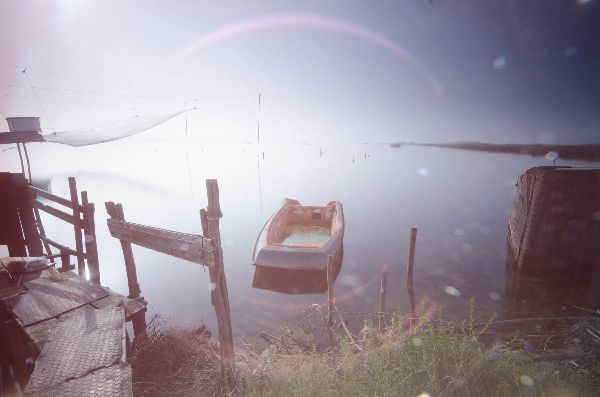
So, if you want the thrill of long exposures, be sure to cover everything! Some guys use black tape on the lens and on the filter holder, some others use socks (cutting the toe) on the lens itself. You can also buy some special crafted cases...
My simple, quick and dirty suggestion is to use a black tissue, to cover everything (lens, camera, etc). Beside protecting from light leakage, it is very handy if you want to make some shadow to see better the display under the sun.
Don't fear the sun!
Probably you've been told not to shot directly toward the sun, especially when you use filters. Because of reflections, flares, and so on.
This is true of course... but it should not be a reason to limit our creativity!
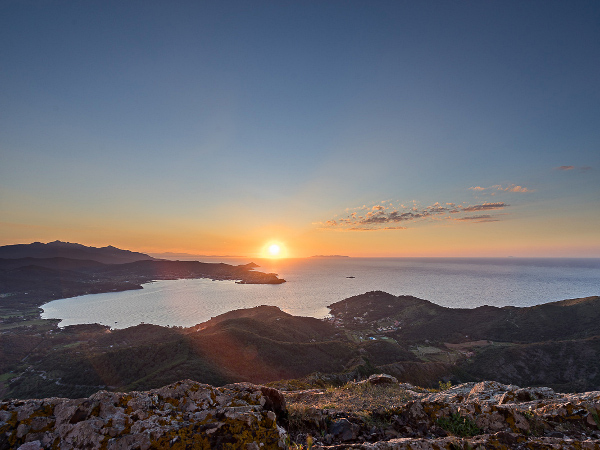
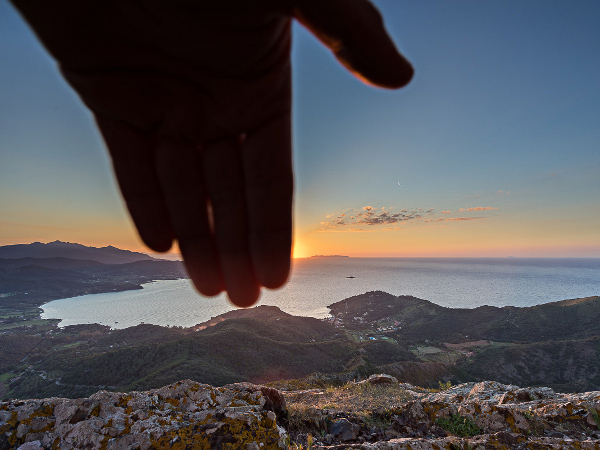
Here there are 2 tricks; the first is very simple: keep your filters clean! ehehe, if you have dust or halos on them, every problem will be amplified. The second tip is to take 2 shots: take the first one as usual, exposing correctly. Then take a second shot, with the same settings, covering the sun with a finger. Now you have a flare-free shot, that you can use in photoshop (or in your preferred editor) to restore the parts affected.
That's it, easy peasy.
Don't trust the number
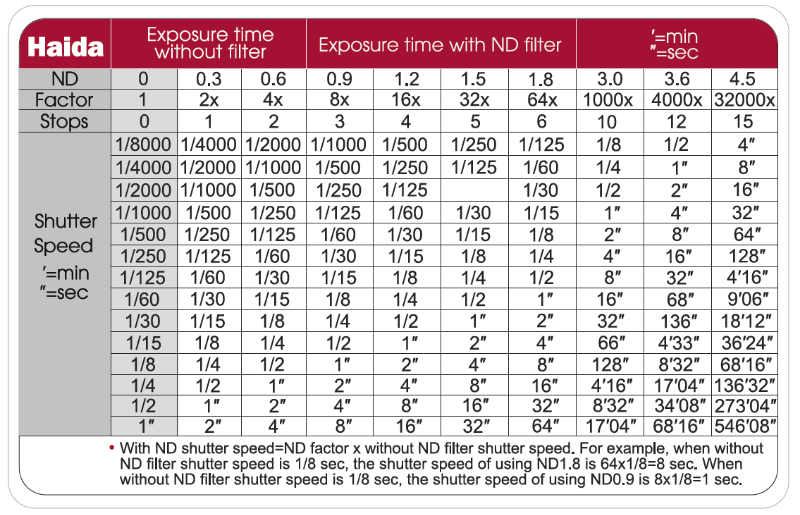
Every producer labels his filters following different methodology: number of filtered stops, optical densities, ND factors, etc. Anyway, whichever notation they will use, believe me that the number are not to be considered as perfect!
Trying to explain a bit better with an example: simply following mathematical calculation, a 1 second shot taken without filter will have the same exposure of a 64 seconds, taken with a ND1.8 filter (or ND64, following ND number notation).
But this is true only in theory: in a practical situation, a 64s shot may appear brighter or darker, because the glass density is not perfect; it is uniform, but not perfect. And this is even more true when speaking about filters with a high ND number.
My suggestion is to check and know your gear, taking some test shots in a controlled environment (with a constant light source); this way you can even calibrate your gear, as suggested by many great folks out there.
In my personal experience, a fine calibration is useless, because most of the times you will shoot in fast changing light conditions: during a long exposure on a windy day, it is quite common that the cloud movements will cause the sun to be more or less covered, giving you unpredictable results.
Anyway it is very important to know if your filters are correctly named or not, in order to make macro adjustments.
CPL is overestimated
In the past (and not only in the past!) I read so many articles about "tips&tricks" for landscape photographers... And nearly all of them included something like "Always use the polarizer filter". If you want to know my opinion, I think this is one of the worst suggestion you can receive... ehehe
Ok, do not get me wrong: CPL is a great filter! It really helps in many way: enhance the contrast (so reduce the haze), permits to manage the reflections, boosts the color of the sky... and so on. But at the same time... there are some cons.
I do not want to bother you with the physical explanation of how a polarizer works; just to recall, a CPL stops the reflected light by an amount that it is not constant, but that is proportional to the incidence angle.
If you shoot a relatively small subject, the polarization amount will be more or less equal on all the frame. But as soon as you will use wide angle (and we all love ultra wide angle lenses!), the amount of the polarization will be different over the frame. This means you will have, for example, a blue sky that will be deep blue in the center of the frame, and washed out at the corners.... Not a good result!
A small add-on: about Haida gear
Let me tell you something more about Haida filters and holder.
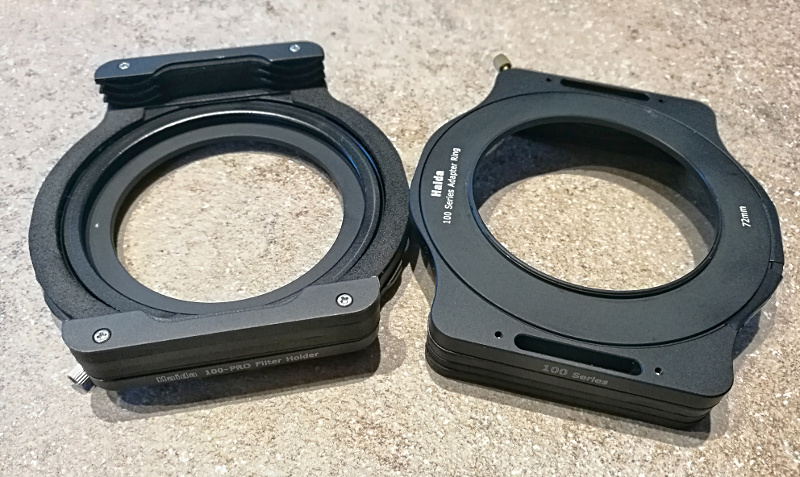
Haida produces two types of holder for 100mm filtering system: the base version and the PRO version (here I will not consider the 150mm series.... we'll keep it for a new article! eheh). Both are made from metal and are built with extreme quality.... but the similarities end here.
 The base version is very light; there is one single circular piece, with attached the plastic slots for the filters, You can use the setup with 2 or 3 slots, it's up to you. The adapter rings are firmly caught in place by a spring-operated mechanism, that permits the rotation of the holder. When mounted on the lens, the Haida base filter holder permits to take shot without vignetting, up to 17mm wide angle lenses (16 is also ok, if not rotated).
What I really love about this holder:
* it is small, compact and light.
* Cheap.
* It is freakin' fast to mount and dismount (thanks to the spring).
What I really miss:
* The spring mechanism keeps the holder firmly in place, but does not block rotation. So when you mount a GND positioning it exactly over the horizon, if you want to use a second filter (like a ND3.0) it is very difficult not to rotate the holder and loose the alignment
* it causes vignetting with UWA lenses (like my 15mm Venus Laowa, that is my preferred choice for nightscapes and some seascapes)
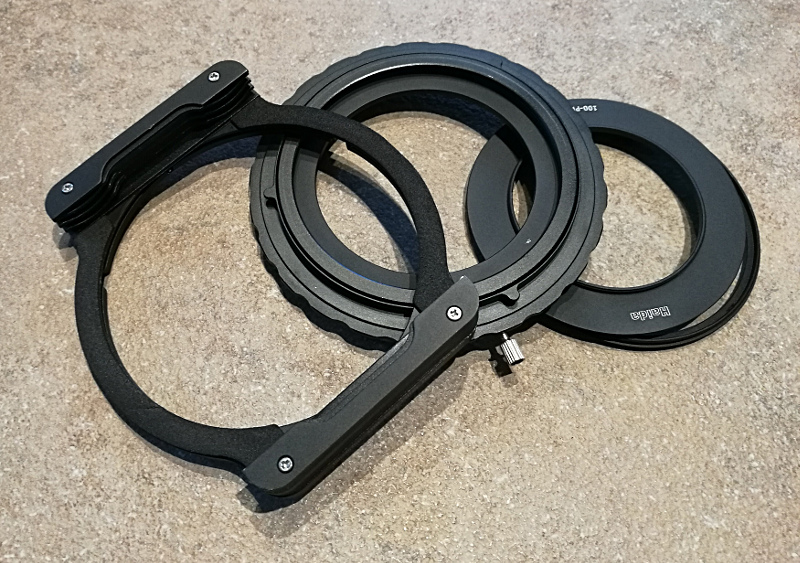
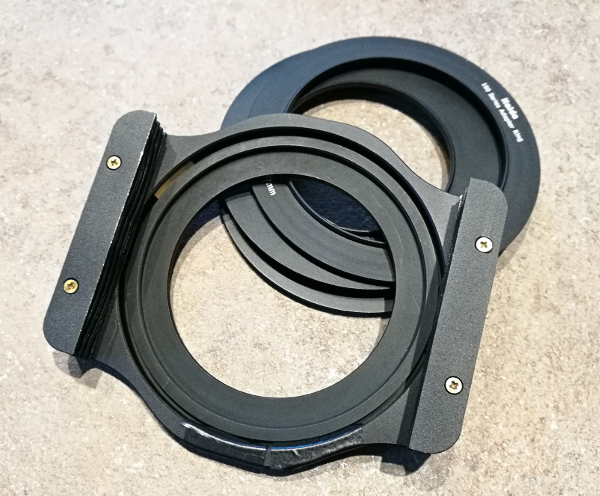
The PRO version was developed following all the feedbacks given to Haida by the pro users; the holder is tough, incredibly well-made. The slots are the only plastic thing (for obvious reasons). The holder is made by 2 separated pieces (plus the adapter rings, of course): the first one contains the 82mm thread for the CPL. The second one is attached to the previous, and can rotate. A small screw blocks the rotation. This is the main advantage (in my opinion) over the base holder: once correctly positioned, the screw blocks the rotation, so any further interaction (like a second filter insertion) is safe. Even with the screw in blocking position, it is still possible to rotate the inner ring (and then the polarizer).
Another difference with the base version is the shape of the adapter rings: they are much more slimmer than the other ones. This way, there is no vignetting even at 15mm, and this is really great!
What I really love about this holder:
* it is possible to block the rotation
* no vignetting, even with extreme UWA lenses
* native CPL mounting
What could be better:
* Just a very small thing: because of the thinness of the rings, sometimes it is not easy to unscrew them from the holder.
If you want to see something more about the PRO holder, you can watch my video review on my channel: